
ב"ה
Trying to Teach Myself to Create My Own Designs

When I was a teenager, I began taking the first steps to being a fashion designer. I learned to sew in classes in my town, in summer classes for students, and in adult education classes. I learned the basics of sewing, but, since I never had the opportunity to set up a room where my sewing machine (the gift I asked for when graduating High School) was set up permanently, it was difficult to motivate myself.
During this period, I also learned how to knit (in the summer program I attended for 6 summers, where I learned art and woodworking, among other things). I had already known how to crochet.
Since I didn't have the wherewithal or the patience to create clothes for myself (unless I had an already created pattern) I began creating doll clothes by knitting and crocheting them, using my own Barbie (or was it Malibu Francie?) as my model/mannequin. I sold them at a local consignment shop.
I also went to Fashion Institute of Technology. I tried taking Flat Pattern Design (twice) and Draping to use these skills to create my designs. By that time, I had begun creating drawings of clothing on tracing paper (I would trace the figure of a comic book character and draw clothing on them like these (the sketches on this page that aren't the jewelry). I have a collection of hundreds of designs (clothing, shoes, handbags) all of which have never been created -- they still exist on paper and in my head (I did actually have one created for me, but I discovered one problem with only designing in two dimensions -- I made a design error by using satin -- which is flat -- for the main part of the dress and velvet -- which is fuzzy and anything but flat -- for the waistband. This, unfortunately, instead of making me look slimmer, made me look chunkier).
 New Project
Learning to Make My Own Patterns
Fast Forward many years (I'm not admitting how many). My nieces visited for the summer and, while looking for something to watch, stumbled upon the 5th season of Project: Runway. Since my niece Lara is also into designing (she designed the dress she wore to her sisters wedding and she also designed dresses for four of her younger sisters and her cousin for that wedding), she and two other of the girls (in later years, some of the younger girls also watched with me) and I got hooked on Project: Runway.
It was Project: Runway that got me back interested in my own designing and my niece and her hard work (and learning to create her own designs) that inspired me to try my hand again at creating. I have been designing fabric on Spoonflower and, in order to put my designs up for sale to others, I need to order swatches for myself. So I have a bunch of design swatches and I decided that I could start out with using them to create doll clothes.

February 13, 2012
I hope to use this lens to trace my progress. I am creating this lens today, February 13, 2012.
I still have my Flat Pattern Design book and I am using this book to teach myself step by step. I began by using some scrap paper to create a pattern for a 1/4 circle skirt, which seemed to me to be the easiest way to start. I drew the pattern and then cut it out in muslin (a friend of mine, knowing I wanted to eventually try to teach myself to sew my own clothes and create my own patterns, bought an entire bolt of muslin for me) to make a sloper (a muslin version of the garment using the pattern in order to work out the "bugs"). The picture here is of a partially sewn version of that sloper.
Last night, I used drawings in my Flat Pattern Design book and see-through graph paper to create a pattern for a simple blouse (front and back) and sleeve (see the photo in the module above). Today, I copied and scanned the paper pattern (so I wouldn't be using the original to cut the muslin and can reprint the pattern as needed). I used the copied pattern to cut out pieces for the muslin sloper for the blouse (see the photo at the beginning of this lens). Stay tuned for more progress as it happens.
 February 14, 2012
Today, I sewed one side of the blouse sloper. I first sewed two darts in the front. then I sewed the shoulder of the front to the shoulder of the back, folding the center part over, since I will eventually need to sew in an area in front for snaps or other connectors.
I then pinned the sleeve to both the front and back cut out areas, pinning the highest part of the curve on the sleeve to the shoulder part I had just sewn together. I used the sleeve that I had previously hemmed at the wrist end.
February 15, 2012
So, as you can see, I sewed together most of the blouse sloper. I am definitely understanding why making the sloper is the first step -- I can see that when I cut the pattern, I didn't leave enough seam allowance (well, I more or less didn't leave any).
I also think that, perhaps, I need to try this with a kimono type blouse. I may begin all over again.
 February 19, 2012
So, today I decided to try sewing the top and the bottom together to make a dress. Again, I'm finding out why one makes a sloper first. I've learned that I need to leave a bit of seam allowance, I need to hem the skirt before I sew up the side seam (though I've started another sloper of a circle skirt and did the hem first and then sewed up the side and from that I learned that I shouldn't sew up the entire hem -- I should leave a bit near the side and sew that after the side seam is sewn)
So I'm trying a new pattern.
(Later on Sunday the 19th:)
I had previously cut out another circle skirt -- I used that pattern to cut out a new skirt sloper (the one mentioned above, where sew up the entire hem and then realized I should have stopped close to the side seam and then I should have done the hem). It's a bit large -- longer than the first one (in the pic here) and wider. I may baste around the waist and gather it.
I also cut out another bodice/blouse/top pattern. This time I made it kimono style (since I had so much trouble putting the sleeves in on this one). I left plenty of seam allowance (ok, so it's a bit big, but that'll give me space to fit it better, I hope!)
Well, I'm starting to figure out why I had so much trouble with this class "back in the day" (as they say).......
Trying to Teach Myself to Create My Own Designs
When I was a teenager, I began taking the first steps to being a fashion designer. I learned to sew in classes in my town, in summer classes for students, and in adult education classes. I learned the basics of sewing, but, since I never had the opportunity to set up a room where my sewing machine (the gift I asked for when graduating High School) was set up permanently, it was difficult to motivate myself.
During this period, I also learned how to knit (in the summer program I attended for 6 summers, where I learned art and woodworking, among other things). I had already known how to crochet.
Since I didn't have the wherewithal or the patience to create clothes for myself (unless I had an already created pattern) I began creating doll clothes by knitting and crocheting them, using my own Barbie (or was it Malibu Francie?) as my model/mannequin. I sold them at a local consignment shop.
I also went to Fashion Institute of Technology. I tried taking Flat Pattern Design (twice) and Draping to use these skills to create my designs. By that time, I had begun creating drawings of clothing on tracing paper (I would trace the figure of a comic book character and draw clothing on them like these (the sketches on this page that aren't the jewelry). I have a collection of hundreds of designs (clothing, shoes, handbags) all of which have never been created -- they still exist on paper and in my head (I did actually have one created for me, but I discovered one problem with only designing in two dimensions -- I made a design error by using satin -- which is flat -- for the main part of the dress and velvet -- which is fuzzy and anything but flat -- for the waistband. This, unfortunately, instead of making me look slimmer, made me look chunkier).
New Project
Learning to Make My Own Patterns
Fast Forward many years (I'm not admitting how many). My nieces visited for the summer and, while looking for something to watch, stumbled upon the 5th season of Project: Runway. Since my niece Lara is also into designing (she designed the dress she wore to her sisters wedding and she also designed dresses for four of her younger sisters and her cousin for that wedding), she and two other of the girls (in later years, some of the younger girls also watched with me) and I got hooked on Project: Runway.
It was Project: Runway that got me back interested in my own designing and my niece and her hard work (and learning to create her own designs) that inspired me to try my hand again at creating. I have been designing fabric on Spoonflower and, in order to put my designs up for sale to others, I need to order swatches for myself. So I have a bunch of design swatches and I decided that I could start out with using them to create doll clothes.
February 13, 2012
I hope to use this lens to trace my progress. I am creating this lens today, February 13, 2012.
I still have my Flat Pattern Design book and I am using this book to teach myself step by step. I began by using some scrap paper to create a pattern for a 1/4 circle skirt, which seemed to me to be the easiest way to start. I drew the pattern and then cut it out in muslin (a friend of mine, knowing I wanted to eventually try to teach myself to sew my own clothes and create my own patterns, bought an entire bolt of muslin for me) to make a sloper (a muslin version of the garment using the pattern in order to work out the "bugs"). The picture here is of a partially sewn version of that sloper.
Last night, I used drawings in my Flat Pattern Design book and see-through graph paper to create a pattern for a simple blouse (front and back) and sleeve (see the photo in the module above). Today, I copied and scanned the paper pattern (so I wouldn't be using the original to cut the muslin and can reprint the pattern as needed). I used the copied pattern to cut out pieces for the muslin sloper for the blouse (see the photo at the beginning of this lens). Stay tuned for more progress as it happens.

February 14, 2012
Today, I sewed one side of the blouse sloper. I first sewed two darts in the front. then I sewed the shoulder of the front to the shoulder of the back, folding the center part over, since I will eventually need to sew in an area in front for snaps or other connectors.
I then pinned the sleeve to both the front and back cut out areas, pinning the highest part of the curve on the sleeve to the shoulder part I had just sewn together. I used the sleeve that I had previously hemmed at the wrist end.
February 15, 2012
So, as you can see, I sewed together most of the blouse sloper. I am definitely understanding why making the sloper is the first step -- I can see that when I cut the pattern, I didn't leave enough seam allowance (well, I more or less didn't leave any).
I also think that, perhaps, I need to try this with a kimono type blouse. I may begin all over again.
February 19, 2012
So I'm trying a new pattern.
(Later on Sunday the 19th:)
I had previously cut out another circle skirt -- I used that pattern to cut out a new skirt sloper (the one mentioned above, where sew up the entire hem and then realized I should have stopped close to the side seam and then I should have done the hem). It's a bit large -- longer than the first one (in the pic here) and wider. I may baste around the waist and gather it.
I also cut out another bodice/blourse/top pattern. This time I made it kimono style (since I had so much trouble putting the sleeves in on this one). I left plenty of seam allowance (ok, so it's a bit big, but that'll give me space to fit it better, I hope!)
Well, I'm starting to figure out why I had so much trouble with this class "back in the day" (as they say).......
Pattern Making Books from Amazon

Though my book has a different cover, I believe this is the book I have and am using.

March 9, 2012
So, as I mentioned before, I had cut a new skirt -- this is what I've done with the new skirt pattern since I cut it out. (In the pic, I put the new blouse pattern over the doll's chest)

This is what the blouse part looks like with the bottom darts sewn in. As you can see, while the skirt is big but can be gathered at the waist (which I did with some basting at the waist), the blouse is quite large and will need some alterations. I think you might now be able to tell why I had so much difficulty with Flat Pattern Design when I was in FIT.

 I decided the best way to fit the top (blouse) was to turn it inside out and put it on the doll. I pinned it on the doll, pinning the seams on the side I was sewing it.

 I had already pinned the two pieces together, so today, I finally sat myself down and sewed them together. Because the pattern for the top was way too big, I ended up laying it down sort of like a blouson (the back is pinned at the waist). The sleeves still aren't hemmed and, because it's a sloper, I'm not going to put a fastener in back.
 Well, this is the best one I've done so far. I still have to hem this, and it is a bit tight around the hips, but I made it with an elastic waist.


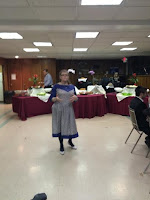
 Another niece was getting married, so I created this dress with a print that has a grape motif (another of my fabric designs). We ended up not making it to the wedding, but we made שבע ברכות (Sheva Brakhot -- literally 7 Blessings -- it refers to the blessings that are said at the wedding and at any place where the bride and groom eat a meal, for the first week after the wedding, where there at least 10 males over the age of 13) -- it's sort of a dinner party. So I wore the dress there.
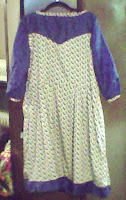
 I decided to make a dress from a curtain. I haven't worn it yet....
March 20, 2012
Today, I sewed up the sides of the blouse piece. The sides are snug around the hips (which is further down than it ought to be) and loose everywhere else. The sleeves are a bit long, but they still need to be hemmed.
I do still need to put in some darts on top.
March 22, 2012
I decided the best way to fit the top (blouse) was to turn it inside out and put it on the doll. I pinned it on the doll, pinning the seams on the side I was sewing it.March 25, 2012
Ok, so I sewed up the darts.
April 17, 2012 (Tuesday After Passover)
I had already pinned the two pieces together, so today, I finally sat myself down and sewed them together. Because the pattern for the top was way too big, I ended up laying it down sort of like a blouson (the back is pinned at the waist). The sleeves still aren't hemmed and, because it's a sloper, I'm not going to put a fastener in back.
 May 8, 2012
Taking the plunge into actual fabric
Despite my lack of success with the muslin version of my pattern (OK, two abject failures), I decided I wanted to try actual fabric. Fortunately for me, in order to sell my fabric designs on Spoonflower, I had to buy swatches (or more, but, for the most part, I did buy swatches) of the designs. So I have a bunch of swatches, which are just about the right size to make a doll skirt. So I took the swatch of the fish design and worked with that. I cut out the pattern (I had scanned one of the patterns from the graph paper and I was able to print it off and use the pattern).
I still have to deal with the closure in the back (I used some of the leftover fabric to make a waistband) and I still have to hem the bottom, but it's not a horrible a start (I think, I hope).
June 27, 2012
Well, this is the best one I've done so far. I still have to hem this, and it is a bit tight around the hips, but I made it with an elastic waist.
 July 11, 2012
I took some of the leftover fabric (after making the skirt, which still isn't hemmed) and am working on a top to go with the skirt. It'll be sleeveless and I probably won't hem this either (when I get to making my own clothes for me, I hope some time soon, I will hem them; keep in mind, it's easier to hem full size people clothes than fashion doll sized clothes). I also am showing you my sewing table here. This, for me, is neat.
 Compugraph Designs Spoonflower Site
Spoonflower is a place where a designer can design his/her own fabric. I have some designs on fabric there -- click on the picture to see all the fabric designs.
Spoonflower also has a weekly contest where you can vote for your favorite design.
 Brief Interlude -- July 26, 2012
While I'm still teaching myself pattern making and clothes making, I can sew a straight (or semi-straight?) line. So I've been taking some of my custom design fabric swatches (8" X 8") and making pillows out of them (with a piece of felt on the back). One of my friends saw the swatches I had and one of the pillows I had made and asked me to make a couple of pillow for her. (Read about how I created the design on the rightmost pillow in this lens.)
These are two I made for myself -- the one on the right has the design I used for one of the pillows I made for my friend (though I used a beige piece of felt for her pillow; black for my own).
Sewing Machine Day
I just found out today that September 10th is Sewing Machine Day. This may commemorate the day that the sewing machine was patented (the man credited with the invention is Elias Howe, but Isaac Singer perfected the up and down motion soon after.
Two alternate dates for Sewing Machine Day are March 1 and June 13.
Fast Forward to August 2015
So I've still been working on the idea of sewing my own clothes. But for now, I've sort of given up on making my own patterns. I decided that since my niece who is going to Fashion Institute, studying fashion design, was getting married, I'd surprise her by creating my own dress (which, actually, ended up as a two-piece) using a fabric that I designed based on the Jerusalem sky line (the wedding took place in Israel). The colors of the wedding were in the yellow/orange/brown range, so I created the outfit in the brown range. It was hardly perfect, but it worked and I got a lot of compliments on it.
Two days after the wedding was the bride's brother's Bar Mitzva (my nephew). So I made a dress for that event also.
The print design, also one I created, is a rainbow version of Lemonade. I figured the color blocking would be more flattering
So that brings us to October 2015

 Another niece was getting married, so I created this dress with a print that has a grape motif (another of my fabric designs). We ended up not making it to the wedding, but we made שבע ברכות (Sheva Brakhot -- literally 7 Blessings -- it refers to the blessings that are said at the wedding and at any place where the bride and groom eat a meal, for the first week after the wedding, where there at least 10 males over the age of 13) -- it's sort of a dinner party. So I wore the dress there.
And Beyond (into 2016)
 I decided to make a dress from a curtain. I haven't worn it yet....
No comments:
Post a Comment